

Key Takeaways
- Skill level: Upper-Beginner DIY | Time: 30-60 minutes
- Before starting your Delta kitchen faucet installation, turn off the sink water supply and remove the old faucet if you're replacing one.
- Delta's MagnaTite® Docking keeps the pull-down sprayer securely in place once installed.
- Water supply lines are color-coded for easy connection: blue marks cold, red marks hot.
- Hand-tighten supply line connections first, then fasten with an adjustable wrench about one turn past finger-tight.
- After installation, run the water for 30–40 seconds to clear any debris, then check all connections for leaks.
So, you bought your dream faucet, and now you need to install it? Piece of cake! If you can turn off the water, you can install a single-handle pull-down kitchen faucet in under an hour. Haven't picked one out yet? Check out our guide to selecting the right kitchen faucet for your space before you get started.
Tools needed to install a single-handle pull down kitchen faucet:
- Phillips screwdriver
- Adjustable wrench
- Bucket
- Flashlight
- Safety glasses
How to install your Delta single-handle kitchen faucet:
- Turn off the sink water supply. If necessary, remove the old faucet.
- Depending on your countertop material and thickness, you may need an escutcheon and gasket to mount your faucet (get them here, if it’s not included in the box).
- Insert the faucet through the mounting hole in the countertop.
- Under the sink, slide the U-shaped mounting bracket over the faucet shank; the supply lines should fit inside the bracket. Screw the nut onto the end of the shank and use the Allen wrench to tighten the nut against the underside of the counter. Make sure the faucet is properly positioned over the sink before you tighten it for good.
- Slide the hose weight over the hose, then push the hose’s end securely onto the faucet outlet. Place the clip over the connection to hold it in place.
- Attach the water supply lines. Look at the ends of each line: A blue tip denotes the cold water line; red marks the hot water. Run each line to its corresponding water supply; the 3/8-inch compression fitting at the end should fit directly onto the water supply valve (if it doesn’t fit, you’ll need an adapter).
If the lines are too long, wind them into a loop at least 8 inches in diameter, being careful not to create a kink in the lines. Screw the lines on by hand, then tighten snugly with the adjustable wrench; one wrench turn past finger-tight should be tight enough.
- Open the faucet handle to “full on,” then turn on the water supply. Let the water run 30 to 40 seconds to remove any debris in the lines. Shut the faucet off and check for leaks. If you notice any leaks, tighten the connections another half turn with the wrench. Still leaking? Check out our guide on how to fix a leaky faucet.
With the water supply lines connected and no leaks in sight, your Delta® kitchen faucet installation is complete and ready to use. A proper installation now means reliable, everyday performance for years to come.
Want to keep it looking brand new? Now that you've installed it, learn how to clean your faucet to maintain its finish and keep it running smoothly.
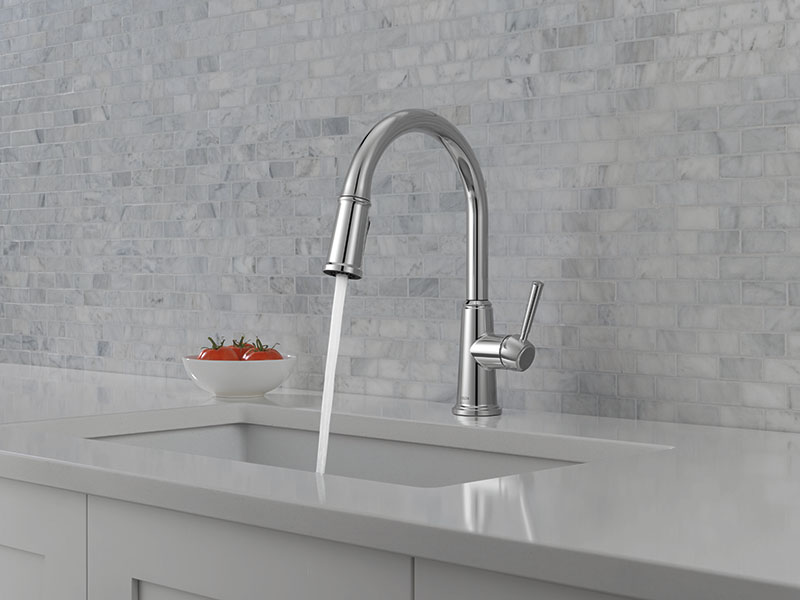
Thoughtful details create lasting style. Pair a Delta® Design Series kitchen faucet with the coordinating bathroom hardware collection for a whole-home approach to design.
With the water supply lines connected and no leaks in sight, your Delta® kitchen faucet installation is complete and ready to use. A proper installation now means reliable, everyday performance for years to come.
Want to keep it looking brand new? Now that you've installed it, learn how to clean your faucet to maintain its finish and keep it running smoothly.
Frequently Asked Questions
Q: How do I tell which water line is hot and which is cold when installing a faucet?
A: Delta's supply lines are color-coded at the tip for exactly this reason: a blue tip marks the cold water line, and a red tip marks the hot water line. Simply run each line to its corresponding shutoff valve under the sink. Each line ends in a 3/8-inch compression fitting designed to connect directly to a standard supply valve. If it doesn't fit, you'll need an adapter.
Q: How tight should I make the water supply line connections?
A: Screw the supply lines onto the valve by hand first, then finish with an adjustable wrench — one full turn past finger-tight is all that's needed. Over-tightening is one of the most common installation mistakes and can damage the fitting or the valve. If you spot a leak after running the water, tighten the connection another half turn and check again for leaks.
Q: What if my faucet's water supply lines are too long?
A: Don't cut or force them. Instead, loop or spiral the excess line into a coil at least 8 inches in diameter before connecting it to the shutoff valve. Since a kinked line restricts water flow, make sure the loop doesn't create a kink anywhere in the line. This is the standard, guide-recommended way to manage extra length on both hot and cold lines.
Q: Do I need to flush a new faucet before using it?
A: Yes. Once the supply connections are complete but still off, place a bucket under the outlet tube where the pull-down hose connects. Open the faucet handle to "full on" and warm position. Turn on the water supply, letting it run for 30 to 40 seconds. This clears any debris that may have entered the lines during installation. Now connect the hose and do a final leak check at all connections.
Q: My new kitchen faucet is leaking at the connections — how do I fix it?
A: First, open the faucet to full on, run water for 30–40 seconds, then shut it off and inspect every connection point for drips. If you find a leak, don't over-tighten. Simply give the connection another half turn with your adjustable wrench. This is the exact fix Delta's own installation guide recommends, and it resolves the vast majority of post-install leaks without needing to redo the connection.
Q: Do I need an escutcheon plate to install my kitchen faucet?
A: It depends on how many holes are in your countertop for your faucet. Before you begin, check your faucet's installation sheet and your countertop's mounting hole configuration.
All Delta® pull-down kitchen faucets come ready with the trim and gasket for fitting a single hole sink configuration. If your countertop has three holes for the faucet, you will need a 3-hole escutcheon plate and gasket. If an escutcheon is not included in the box, Delta® sells them separately to match your specific faucet model.
Q: How does Delta® MagnaTite® Docking help during faucet installation?
A: MagnaTite® Docking uses magnets to keep the sprayer firmly locked in place — including while you're still working on the rest of the installation. It's built into the design, not an add-on step, so there's nothing extra to install; it simply keeps the wand from drooping or swinging as you connect the remaining lines.
Q: How do I mount a kitchen faucet under the sink?
A: After feeding the faucet through the countertop's mounting hole, go underneath the sink and slide the U-shaped mounting bracket over the faucet shank, making sure the supply lines fit inside the bracket. Thread the mounting nut onto the end of the shank and use your Phillips screwdriver to tighten it against the underside of the counter. Double-check that the faucet is properly centered over the sink before you tighten it for good — this is your last chance to adjust its position.
Q: Can I install a kitchen faucet myself, or should I hire a plumber?
A: A standard, like-for-like deck-mount replacement — same hole configuration, same faucet type — is a project most homeowners can complete themselves in well under an hour with just a screwdriver and an adjustable wrench once the old faucet is out.
If you're changing your hole configuration, moving to a different mount style, or your shutoff valves are old, corroded, or won’t turn, that's when it's worth calling a plumber. When in doubt, inspect your shutoff valves first, since a stuck or leaking valve is the most common reason a DIY install turns into a bigger job.
Related stories.
Home Improvement 101
How to Replace a Kitchen Faucet
Home Improvement 101
How to Replace a Two-Handle Faucet

Home Improvement 101
5 Smart Things to Do While Showering